How to add TPM on your VM for Windows 11: VMware, VirtualBox, Parallels Desktop, and Hyper-V
Windows 11 is a massive update, bringing a host of changes — ranging from a grand visual overhaul to enhancements like Microsoft Teams integration and support for running Android apps. When it comes to the system requirements for the new OS, Microsoft has made some significant changes as well. One of the more widely-criticized requirements is the need for a Trusted Platform Module (TPM) 2.0 chip. While that requirement is waived if you’re installing the current stable channel release of Windows 11 (Build 22000.x) in a virtual machine, Microsoft has started enforcing it on newer Dev channel builds.
The reason Microsoft is making TPM 2.0 a requirement for Windows 11 is due to the necessity to offer hardware-level protection against cybersecurity attacks. Keep in mind that almost every PC since mid-2016 has built-in TPM in its firmware — you might just need to fiddle with a BIOS setting to enable it. The scenario is a bit different on a virtual machine (VM), though, as hypervisor vendors have yet to come up with a common standard of TPM passthrough. Moreover, the process of virtualizing the TPM itself greatly differs from one hypervisor to another.
In this tutorial, we’ll show you how to configure some of the most popular hosted hypervisors in order to add a virtualized TPM device for a Windows 11 VM.
Navigate this article:
What is a hosted hypervisor
Hosted hypervisors need an underlying operating system to work. They can be installed like regular computer programs. A guest operating system runs as a process on the host. Due to this design, you don’t need a specialized hardware just for the sake of virtualization — anyone can use a hosted hypervisor on their home PC.
Hyper-V
Originally created as a native hypervisor, Microsoft Hyper-V is now included as an optional feature in the client editions of Windows (Pro and up). With a little tweaking, it is also possible to install it on the Home SKUs of Windows.
Once you enable the Hyper-V feature on your host Windows OS, you can easily add a virtualized TPM 2.0 device on a Windows 11 VM by following the steps below:
- Open Hyper-V Manager.
- Click on the host computer name from the left pane.
- If you want to spawn a new VM for Windows 11, make sure to select “Generation 2” during the VM creation wizard.

- For existing VMs, select the appropriate one from the right side pane and confirm the “Generation” setting reads “2” in the “Summary” tab at the bottom of the page.
- Right-click the Windows 11 VM, select the Settings option, and click on Security.
- Under the “Secure Boot” section, check the Enable Secure Boot option.
- Use the “Template” drop-down menu and select the Microsoft Windows option.
- Under the “Encryption Support” option, check the Enable Trusted Platform Module option to enable the virtualized TPM.

- Optionally, check the Encrypt state and virtual machine migration traffic option.
- Click the OK button.
If you prefer to manage your Hyper-V settings from command line, then you can also use the Enable-VMTPM PowerShell cmdlet to perform the aforementioned steps. To know more, take a look at the official documentation of the cmdlet.
Oracle VM VirtualBox
Oracle VM VirtualBox is a fantastic open source hypervisor and the developers behind the project are actively working on features like Secure Boot and TPM 2.0 for Windows 11 support.
Notably, the current 6.1.x lineup of VirtualBox will not likely receive these features due to the massive changes required in the codebase. The next major release, i.e. VirtualBox 7 should support them out of the box. There are development snapshots available, which include preliminary support for software emulation of a TPM 2.0 device, but your mileage may vary.
If you’re ready to play with the bleeding edge builds, then download the latest Oracle VM VirtualBox snapshot release from this page. Next, create a VM instance from scratch and set the target OS as Windows 11. The hypervisor should automatically create a virtualized TPM device for the VM. The module can be seen by booting to the UEFI firmware and navigating to Device Manager => TCG2 Configuration.

Parallels Desktop
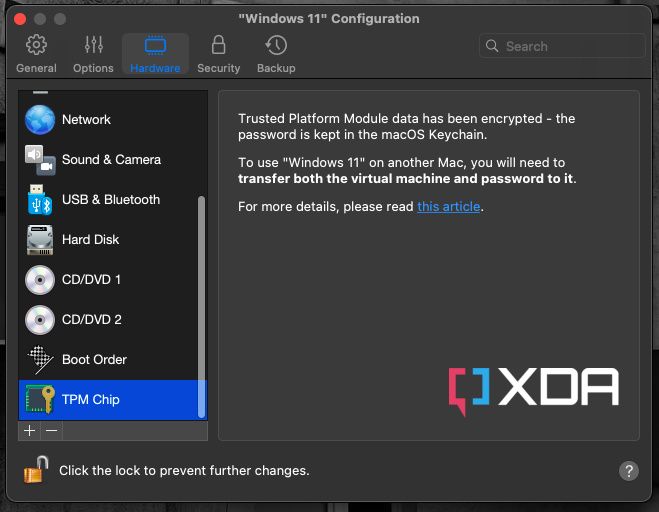
Starting version 17.1.0, Parallels Desktop enables the virtual TPM chip (vTPM) by default for all Windows 11 virtual machines — both new and existing — on Intel-based Macs as well as Apple M1-based Macs. In case you’ve a legacy version (like Parallels Desktop 15 and 16 for Intel-based Mac computers), a vTPM chip is available for Pro and Business Editions only. Parallels Desktop 16 doesn’t support this feature on Mac computers with Apple M1 chip.
Note that when the virtualized TPM is enabled, the virtual machine is restricted from running on other Macs. Moreover, it cannot be started on another computer if copied or moved.
The manual process of enabling vPTM on Parallels Desktop VMs is as follows:
- Shut down the Windows VM.
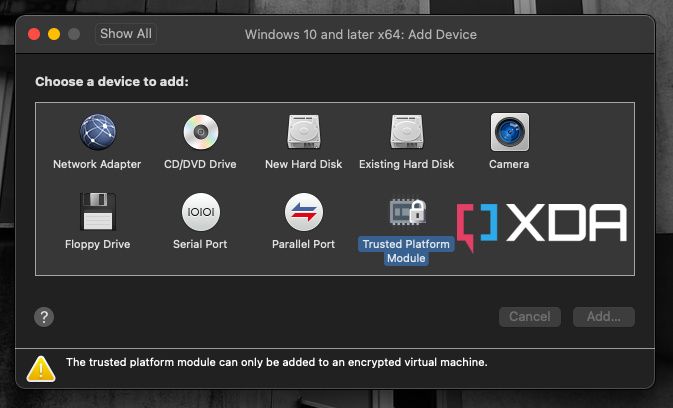
- Open the configuration settings of the VM. Then navigate to the Hardware tab, click on the “+” sign, and select TPM chip. Then click on the Add button.
- Start the VM. If everything goes right, the Windows instance will automatically detect the TPM chip.


VMware
VMware offers several hosted hypervisors for Windows, Linux, and macOS. You can easily enable a virtualized TPM on all of them.
VMware Fusion Pro and VMware Workstation Pro
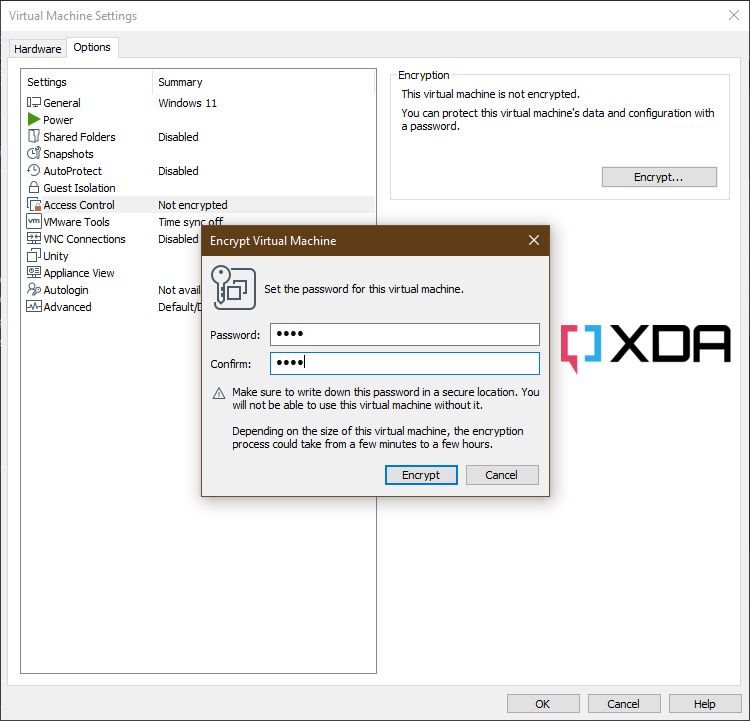
For VMware Fusion Pro (macOS) and VMware Workstation Pro (Windows/Linux), you have to create a VM with a minimum hardware version of 14 and firmware type set as UEFI. You also need to encrypt the VM before attempting to enable the virtualized TPM.


Encrypting a virtual machine under VMware Workstation Pro
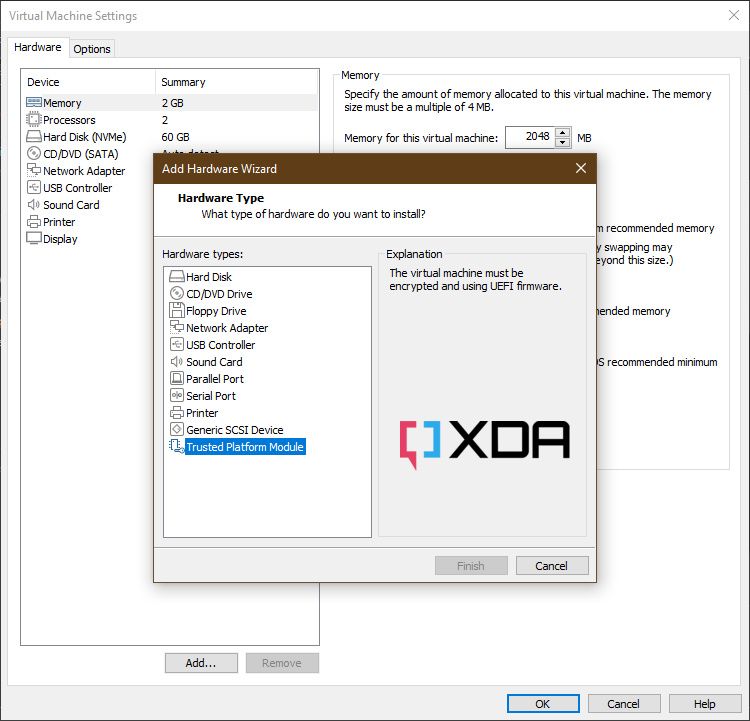
To add the virtual TPM 2.0 device, go through the following steps:
- Select the virtual machine from the left pane (for Workstation Pro) or from the Virtual Machine Library (for Fusion) and open its Settings.
- Click on “Add” (“Add Device” for Fusion).
- Click on the “Trusted Platform Module” entry. If the option is not available, the Trusted Platform Module device is not supported on the guest.


- Click Finish to complete the wizard.
VMware Workstation Player
Unlike its “Pro” sibling, VMWare Workstation Player doesn’t offer an option to add a virtualized TPM. Nonetheless, you can still enable it using a nifty tweak.
Back in October this year, Michael Roy, a VMWare Product Manager, confirmed that users of the free VMWare Workstation Player can enable TPM through an undocumented flag. Under the hood, the flag partially encrypts the VM without a password. The tweak should work with VMWare Workstation Player 16.2/Fusion Player 12.2 and above.
oh but you should try this new experimental and currently undocumented feature… Instead of encrypting and adding the TPM, just add this VMX flag instead:
managedvm.autoAddVTPM=”software”It only encrypts enough for the “secure enclave”, so perf should be way better, & no pwd.
— Michael Roy (@mikeroySoft) October 14, 2021
Here’s how to add TPM to a VMWare Workstation Player VM:
- Create a new guest OS, but don’t install any OS just yet.
- Close the hypervisor, and navigate to the folder where your VM is stored.
- Locate the VMX file, which is the configuration for the target VM.

- Open the VMX file with a text editor like Notepad and add the following line to it.
managedvm.autoAddVTPM = "software"
- Save the changes and close the text editor.
- Start VMware Workstation Player and access the VM’s settings. It should list TPM as an option, but you can’t edit it with the free version of the application.

- Proceed to install Windows 11 (or any other OS) normally.
Verification
After configuring the hypervisor, do the following to check if the virtualized TPM is working properly.
- Start the Windows 11 VM.
- When you’re at the desktop, press the Windows key + R on your keyboard to open the Run prompt.
- Type
tpm.mscand press enter. - You should see the TPM Management console, and it will tell you if you have a TPM device, and what version you have.

Virtualized TPM under Oracle VM VirtualBox
As you can see, configuring a virtualized Trusted Platform Module 2.0 device on a hypervisor isn’t that difficult, but it’s not a completely straightforward method either. Hopefully, this tutorial made the process easier for you to understand and follow. Enjoy playing with Windows 11 VMs!
The post How to add TPM on your VM for Windows 11: VMware, VirtualBox, Parallels Desktop, and Hyper-V appeared first on xda-developers.
from xda-developers https://ift.tt/3Fw6zDa
via IFTTT
ليست هناك تعليقات: